Tuesday, December 8, 2009

50 gallon WIP

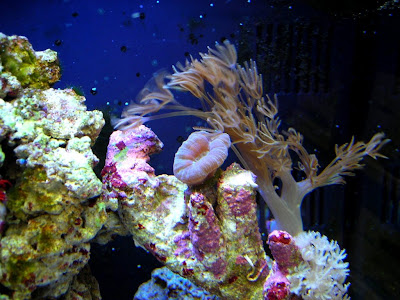
Well I've finally got my 50 gallon up and going. It's actually had water in it cycling for about a month but I just got my lights wired in the other day. I ordered a TEK T5 retrofit kit with AquaActinics reflectors which are supposed to be some of the best out there, and a couple of UVL bulbs, one white and one super actinic. I mounted the ballast on the back of the canopy and have been monitoring the heat, so far it's gotten hot but not too bad which I suppose is normal for a ballast. I know I need more rock but this project has been on a 'deal-only' basis and I've been biding my time buying this and that for it as I come across awesome deals. I am very satisfied with how it's turned out so far, hopefully now with the lights in we'll get an ugly algae bloom so I can get my clean up crew (hermits and snails etc) and finally have some life in this thing! As it is I've got one lone anemone/coral something or the other with clear bulb-like tips that comes out at night and can be seen clearly with a flashlight...oh yeah, and lots and lots and lots of tiny little copepods everywhere! Good stuff, can't wait to see some coraline growth :)

Anyway, here is the tank and stand before I sanded, stained and modded it for reefing, this was a few months ago (notice the single bulkhead at the bottom):


Had to build up an acrylic box around that bulkhead and then I built a 'Durso' standpipe in there to silence the drain so it didn't sound like a toilet. Lots and lots of stuff on the internet to DIY. I'm a helpless noob so thanks to my buddies and fellow reef-a-holics out there for all the tips.

Here is a recent shot of what it now looks like:


And because I LOVE the blue glowing look and one of the main reasons it's sitting in our living room currently...


For the sump below I've just got a 20 gallon long with a couple of baffles and a huge mess of PVC and a cheap skimmer (Coralife), here's a shot of some of the guts down there:


Anyway, definitely more to come, I think now I will focus on cleaning up some wires and do some power management. Need to buy a reef master test kit, a magfloat and probably need another powerhead to move some water in the display tank a bit more.

-Clay

Wednesday, August 26, 2009

Updated 9 Gallon Reef Pics

Well, some of my Coraline has turned white instead of the deep purple it was, so that's kindof a bummer. But other than that things are growing and looking very nice. No algae or cyanobacteria to be seen! I keep the refugium light on growing a bundle of Chaeto back there pretty much at all times. I imagine I'll need to order some more lights here pretty quick just in case these go out anytime soon. Never can tell with stock lights...anyway, here are some pictures!

Here is the front tank shot as it sits on my desk here at work. Hard to get anything done with this thing but it sure does make for attractive decor.


My two Clownfish, kids named them Nemo 1 and Nemo 2 of course :)


These are my two SPS (Small Polyp Stony) Corals, they branch and grow all different ways. Pretty cool to watch them grow over a period of months or even weeks.


This is one of my favorites, it's called a Frogspawn, it's a LPS (Large Polyp Stony) and is pretty mean to anything that it touches.


The CandyCane LPS Coral, another one of my favorites, it will eventually split and grow into more 'heads' and branch out. It has feeder tentacles that come out of it at night, looks really cool!

Monday, August 10, 2009

Bathroom Project

Well, I spent the better part of 2 weekends ripping out part of my bathroom walls, redoing the guts and re-tiling the wall. It all started with a musty odor with visible mold and the wife having headaches. The house we moved into 4 years ago was already 30 years old. It's a big house for what we paid for it though :) Well anyway, I took a rubber mallet to about 20 square foot of the wall all around the tub where the mold was visible. As it turned out, it was rotten all the way to the insulation. So I ripped that out and replaced it and a few boards. Here are some photo's of yours truly right before I took out the existing tile with extreme prejudice and the mess that resulted. (it's pretty gross, fair warning!)


After replacing the insulation:


A word on plumbing, HELL. The plumbing needed to be replaced obviously, it really dated the house and I wanted something new anyway. Little did I know I was going to drop $60-70 on Sharkbite connectors to install the new system. If you've never heard of Sharkbite fittings and you are ever going to do any copper pipe work, do yourself a favor and check these out here. They work miracles and you don't have to solder anything. Unfortunately I was so involved in what I was doing I neglected to take some pictures of the new shiny copper fortune I had created that would never be seen again (hopefully). Anyway, once this was done it was time to seal it all up...

So some genius decided they would use regular drywall behind the tile instead of some sort of mold-resistant cement backing so I decided to fix that and installed Hardiebacker Cement board. Let me tell you, this stuff is a royal pain to cut. Not to mention I had to double-back the boards (1/2"x2) in order to keep the right depth. I am glad I went with it in the end though, because it's solid and will resist mold and mildew.


So the tiling was not fun. Here's the story. I had purchased tile from Home Depot because it was the only place in town that stocked the 'Bone' color tile that matched the rest of the wall. Well, I start to throw a few pieces up there to see how they would look ... the grout line was off by 1/16" after about 3 tiles because the edges of the tiles I purchased were beveled. This completely stopped me in my tracks and I searched and searched for the next week trying to find the correct tile color without the beveled edges on the tile. Here's a picture to illustrate:


Fed up and ready to complete the project, I just decided to improvise. I put in a border (just the border cost me $60 in tile, highway robbery I say) and changed the pattern of the tile from straight to angled. I borrowed a wet saw (and a beer or two) from my neighbor and started measuring and cutting the tile I got from Home Depot with the hated beveled edge. Took me all durn weekend to cut all those crazy angles. Once I finally finished tiling Sunday evening I threw the grout up there and installed the faucet and handle assembly. I finally finished this project up at 12am sharp on Monday morning. Amazingly, after 2 weekends of this, I am still married but I'm sure my kids doubt my sanity now after seeing Daddy in the bathroom for 18-20 hours all weekend talking to himself and ignoring everybody with a funny look in his eye.

(click to enlarge the pics)


Next project, retiling the floor. Although I don't expect this to take much effort I hold no illusions about Mr. Murphy and his antics...

Friday, June 26, 2009

Frogspawn and Hammer Coral

I just got an awesome deal from a hobbyist I work with on a nice sized Frogspawn and Hammer frag. Man they look nice! I really need to stop getting things for this tank. The hobby is so addicting!

Anyway, I also got a bag of Chemi-Pure Elite to combat yet another outbreak of cyanobacteria. We'll see how it goes!

Pics:


Tuesday, June 9, 2009

Updates

Well, it's been a little while since I've updated but the Nano is doing well. I have a lot more coraline growth, things are crisp and the fish and corals look healthier than ever!

I am still seeing creeps of Cyano here and there but I guess that stuff just comes and goes. Just as long as it stays under control I guess I can deal with it.


I am trying to figure out how to take decent closeups...I think this is the best my little Sony Cybershot 7.2 is able to achieve..


Wednesday, May 27, 2009

Pics

New Ricordea Yuma frags!


Tuesday, May 26, 2009

Update

Ok, no trace of any more Cyanobacteria! I still have some GHA but the diatoms have even practically disappeared. I'll post some pics later.

I was out of town over the weekend and had the fuge light on the entire time (about 3 days) with the normal light cycle. The corals' growth have been really surprising, I now have purple rims on all sides of my plating Montipora and the branching montipora has new branch growth as well. The Zoa's are now fully open and everything else is doing just as good. I have noticed more purple and green coraline growth as well since I left on Friday. This is good!

More later...

Tuesday, May 19, 2009

War on Algae

Follow up, seems like the weekend did *some* good with the algae. The cyano is practically gone thank goodness, now I'm left with green hair algae all over my back wall and on that front-most and top rock. To the snails' credit, they have been really eating away at the stuff. Just seems like it is taking them forever.

Before pic w/ Cyano last week:


After pic (Oh yeah, I added some more rock with Xenia):


The waving hand Xenia seems to be doing ok, but the Pom Pom Xenia seem to be an ashy color and don't look so good. None are really 'pulsing' either. I hope they don't croak in my tank and cause an ammonia crash. :(


Sunday, May 17, 2009

Tank Maintenance

Well, I've had quite the algae problem with my tank lately. It seems I've been overfeeding my Clowns and causing excess nutrients which in turn fed a colony of cyanobacteria in my display tank. Hmmm, cyano-what? Yep, the notorious red slime algae that's not an algae. It's a bacteria that can easily take over your tank and it's quite unsightly. Anyway, I noticed this about 2 weeks ago, since then I've been feeding sparingly and doing a 15% water change every other day. I blasted most of it off my rock with a turkey baster and with the addition of Chemi-Pure in the fuge area I haven't seen it come back although some still remains in the sand bed unfortunately, but it isn't growing anymore thank goodness!

This last Saturday I've added some Cheato algae to the refugium to compete with the nuisance algae in the display tank. I've also killed the lights all day Sunday after reducing the light cycle from 9 hours to 7 all last week. Hopefully this has helped out, we'll see tomorrow! I'll be posting pics as well.

Monday, May 4, 2009

Hydor Korali Nano Powerhead

Well, last week I picked up a Hydor Korali Nano powerhead for the tank, I decided to go with the flow of the factory pump but I may change it up a bit later on. I really like this thing and it hits the dead spots in the tank with ease.

My corals are doing ok, the Candy Cane coral is looking a little sad today but Saturday night it had its feeders out full force to the point where it looked like a little anemone. I have it anchored near the top, about 4 inches from the surface. The Zoas are doing great, they open up all the way now and seem fairly happy. The SPS is still doing fine where I put it a few days ago. The Galaxy coral is off by itself and is still rather small but I don't want to risk it stinging any other nearby corals because those can stretch further than you'd think. I added a turbo snail last week and it has been doing much better than expected in getting rid of that hairy algae, most of it is gone!

I've actually started to see coralline growing near the bottom of my tank on the glass and a few spots in the substrate. That's a good thing! Need to maintain top off water with the calcium and alkalinity so the coralline doesn't use it all up.

I plan on checking the parameters again this evening after work and doing another water change this week, probably on Wednesday if everything is ok.

Here are a few pictures of the tank recently:


Wednesday, April 29, 2009

Another Update!

So the tank seems to be coming along nicely, I got a pair of clowns and a few new corals. Hope everything continues to thrive and grow! I am really liking this little tank :)

The permanent residents of this tank:


An awesome coral frag of a CandyCane:


Some neon green Zoas:

Thursday, April 23, 2009

NanoWave Update

Well, I've done a few things to my Nano Reef tank here, I added 3 Nassarius Snails, 2 Blue-Legged Hermit crabs and 1 Scarlet Hermit. I got a Montipora Digitata SPS frag for $2 as well just to see how well it would do in my newly established tank here. I also arranged the rock so that there would be caves and bridge-like structures to make things more interesting. If I like them the way they are now I may epoxy them together so they don't move around with the little invertebrate's digging around in the sand there.

I started adding some Kalkwasser today as a top-off which is basically RO or distilled water with calcium hydroxide added to it. So it's basically lime-water :) Helps with the parameters of a reef tank so I should start to see a lot more coralline growing in there hopefully!

Here is a pic of the rock setup:

The Montipora Digitata:

This is a cool shot of a couple of 'Spinoid Worms' and one of the Blue-Legged Hermits:

Another one of the Blue-Legged Hermits perched on the ledge of some rock:

The Scarlett Hermit:

Wednesday, April 22, 2009

NanoWave pics

Well, here are some pics of the Nanowave before I added the argonite substrate. So far I've seen some aiptasia anemone's (pest!), a starfish and some spinoid worms and feather dusters pop out of this rock. It's fun to see what comes out of 'live rock'. The tank itself is simply awesome. Only downside is it gets a little hot :( More to come!


Friday, April 10, 2009

Nano Tank!

Ok, I got a little interested in reef tanks...ok, a LOT interested. I recently picked up an AquaMedic NanoWave 9 tank (9 gallon) and I love it! Great price too by the way at $90 with free shipping. It includes a venturi style protein skimmer, a fuge area with shelves in the back for various filter media and a pump.

I had bought some live rock from a local guy here, it was an ok deal, $30 for about 7lbs of the rock. It was mostly cured already so I've just been keeping it in a bucket of saltwater with a powerhead in the garage until the tank was ready. Yesterday I filled the tank up with water and installed a little heater to bring the temp up to 78F. Late last night I came up to the office (I am keeping the tank on my desk here) and had to do some work so I went ahead and mixed up the salt 1/2 cup per gallon. I had 8 1/2 gallons in there to allow for the live rock displacing the water later. The salinity was roughly 1.022.

This morning I came in and mixed a bit more salt into the water to bring the salinity to 1.023. During lunch, I went home and grabbed the live rock and put it in this afternoon. Need about 5 more lbs at least though so I'll be checking on some rock up at the local fish store. Also will get some pics posted soon!

Sunday, April 5, 2009

Aquarium Update


Well, the tank is doing well. I had an ICH breakout in there a couple of weeks ago and I successfully cured it by simply using heat and salt. I have kept a log of the treatment:

------------------------------------------------------

*****************
Day 1 - 3/21/09
*****************

Noticed after adding fluorescent bulbs that several of my fish had little white specks. After doing some research, I believe these white specks in addition to the fish occasionally scratching themselves on the decor attribute to the notorious 'Ich' desease which is apparently common but a nuisance and can eventually kill the fish if left untreated.

I am raising the water temp to about 85F over the rest of the afternoon and evening to speed up the cycle here and hopefully reduce or prevent the tomonts from multiplying. Also adding 2 tbsp of salt over the next 24 hours to kill off the thermonts if any do reproduce. 1st tbsp was added after a 50% water change earlier today. Tetra's are becoming very listless.


*****************
Day 3 - 3/24/09
*****************

Maintaining temperature at 85F (highest heater will heat the water). Have done 2 water changes except for yesterday, added 1tbsp salt this evening. The Molly and the Platy seem to have lost a few of their 'cysts' however one neon tetra seems to have gained quite a few. 2 or 3 Neon Tetra's have noticeable spots. Hopefully should see some of these disappear by Thursday or Friday. If not I will medicate the tank as much as I loathe putting chemicals in the tank.

*****************
Day 5 - 3/26/09
*****************

Did a 25% water change last night, added more salt (about half a tabelespoon). Today I Noticed that none of the other fish have the little white specks on them except for the two Tetra's that were bad this whole time, and even they seem to be losing some of the specks. The Molly has not been scratching herself today either that I've noticed. Not getting hopes up yet because the little suckers may just be hiding out reproducing and waiting for a host to swim by...we shall see.


*****************
Day 8 - 3/29/09
*****************

Another couple of 25% water changes the past 2 days, virtually all traces of ICH gone. No spots on any of the fish all day yesterday and all day today. Will maintain treatment for another 2-3 days to finish off any other thermonts that may still be alive.

*****************
Day 10 - 3/31/09
*****************

Checked today and still no traces of ICH, going to gradually bring temp down to 78 or 79F over the next 24 hours and then do another water change and not add any salt. Hopefully after 4 days without the spots they won't come back, but you never know. Regardless, I feel my Tetras have had enough of this salt and heat this month. Here's hoping it's gone for good!
------------------------------------------------------

Indeed, no sign of the ICH since then! I lost all but 3 of my Molly fry as well, don't know what killed them although I found one of them in the filter still alive but despite by best efforts it died a few hours later. I went ahead and got a Mystery Snail (Apple Snail) and that little guy is awesome. Carly and I named him NOS because he is the fastest snail I've ever seen, it can book it across the aquarium in no time. Check out the pics!