Original Doom PC Box Restoration Project
I've been looking for an old boxed copy of Doom for PC from 1993 in recent months to fill out my shelf collection and finally found one that was relatively affordable on eBay at $29 but was in pretty bad shape. Typically, these boxes go for hundreds and especially since 2020 when COVID really seemed to spark nostalgia in us millennials as many sat around the house trying to find something to do. Needless to say, I'm not spending hundreds on any cardboard box, no matter how nostalgic I get, but apparently my financial situation is different than other people because these boxes ARE selling for hundreds, up to $700 or more in some cases!
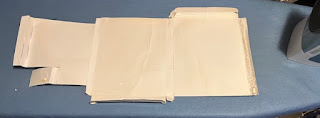
Anyway, here is the state of the Doom retail shareware box I was lucky enough to snag online:
Yikes! It was creased and twisted and was squished in most places. Wouldn't really work on a shelf for display in this state. I had been looking online at some of the videos and articles on box restoration and I decided to try my hand at it. Using an iron, parchment paper, a glue stick, hobby knife, some high quality card stock and patience I set about my task.
Before going further I should state that I know there will be some that are wincing at this sort of thing and say we should leave these in their existing condition for preservation but in my case I just want something I can display that is still an original. I don't plan on making hundreds with this by flipping it and even if I did end up getting something better and selling this piece it would be boldly noted that it's been 'restored'.
After separating the sealed side I knew right away that I would want to reinforce the box with some high-quality card stock on the inside after flattening the box out. To do the flattening I decided to use parchment paper and an iron on a block of marble I had in the kitchen as a cutting board. It was flat and heavy so it worked pretty well I think.
The flattening had the desired effect I think and took out the big twists by relaxing the fibers throughout with a bit of moisture. The parchment protecting the cardboard from wrinkling fairly well. In a previous attempt some months back ironing directly on the back side of the box with steam nearly ruined a test box. Once I was satisfied and several passes later I left it on the marble and sat a few heavy books on top overnight.
Easton Press books sure are pretty!
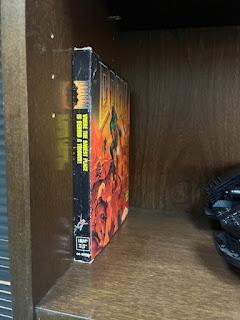
At this point, I got excited and didn't get pics of the reinforcement process but I'll describe it here: I used card stock laser paper and traced the outline of the flattened box for the front piece and back piece. I then just used a hobby knife to cut about 1/8" inside the traced outline (due to edge bending and what not, it doesn't need to be perfect, just help hold it all in shape). Once cut out I used an Elmer's glue stick to adhere it to the inside of the box and just folded it back up. This was the result and I'm fairly happy with it!


